Firm View - Add Client
The article provides CPA Firm Administrators with step-by-step instructions on how to add a new client account in Crunchafi Lease Accounting by clicking "+Add," entering required details such as client name, accounting standard (which is permanent), product type, billing method (either firm-billed or client-billed), and setting client access permissions, while noting that firm administrators retain access to all client accounts regardless of access settings.
Firm View: Add Client
This article is intended for CPA Firm Administrators only and covers how to enter a new client account
Add New Client Account
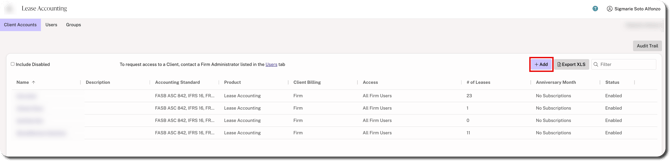
1. Click +Add above the table.
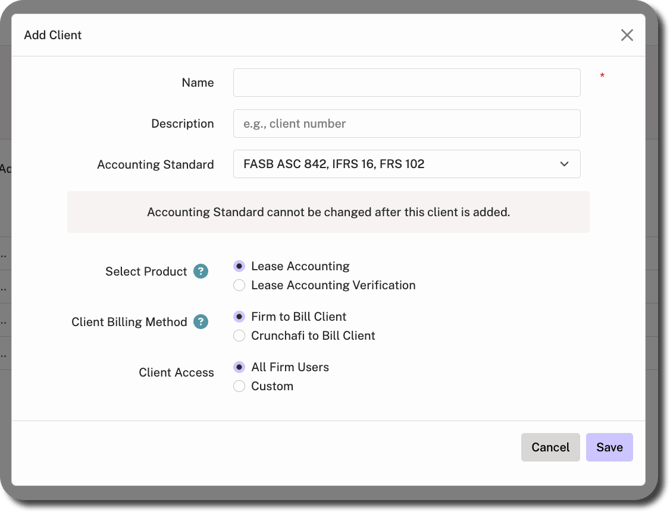
2. Select/enter the following from the Add Client window and then click Save:
- Enter a client name (required) and description (optional)
- Select the accounting standard ( IMPORTANT: cannot be changed once saved)
- Select the product (i.e., Lease Accounting or Lease Accounting Verification); for additional information about selecting product type, click here.
- Select one of the following billing methods:
- Firm to Bill Client: Invoices are billed to the firm and separated by client
- Crunchafi to Bill Client: Invoices are billed directly to the firm's client. For more information about this process, click here.
- Select whether Client Access should be granted to All Firm Users(default) or Custom; you must select individual groups or users for client access if custom is selected
NOTE
Firm Administrators will have access to all client accounts regardless of the Client Access setting.
Edit Client Account
To edit the name, status, product, or client access options for an existing client account, hover over the row on the Client Accounts list and click the edit icon at the far right.
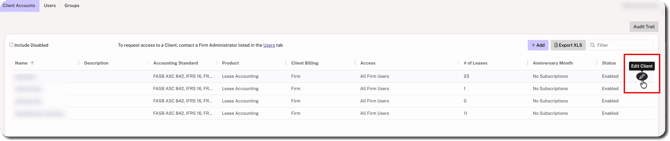
Make your changes and click Save in the bottom-right corner.
Was this article helpful?
YesNo