Managing Workspace Access
The article explains that workspace access in Crunchafi's Data Extraction portal can be managed by any user with access—default users can add or remove users only from workspaces they have access to, while administrators can manage access for all workspaces but must request access themselves; access is controlled via the Workspace List by clicking the user group icon or through the Workspace Details view by editing user selections and saving changes.
Managing Workspace Access
Any user with access to a workspace can grant or restrict access.
Access to a workspace can be updated after the workspace has been created. Default users can add or remove users from workspaces to which they have access, while administrators can add or remove users from all workspaces in your Data Extraction portal.
📝
Note
Administrators do not automatically have access to new workspaces. To gain access, they must also follow the instructions in this article.
Workspace access can be managed from two places:
Workspace List
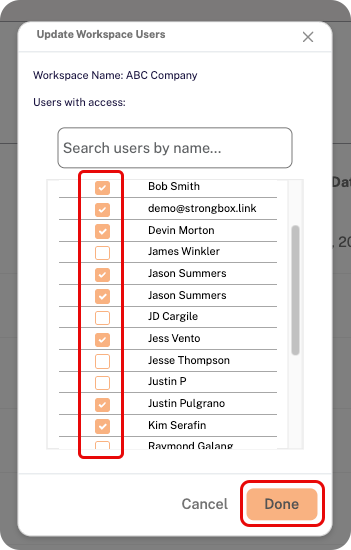
Click on the user group icon at the far right of the relevant row on your workspace list page.

Select/de-select boxes for specific users and then click Done.
Workspace Details View
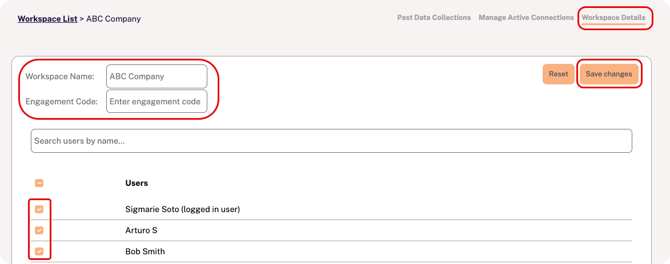
Click on the hyperlinked name from the workspace list to open the details page and then switch to the Workspace Details tab. You can update the workspace name, enter an engagement code (if applicable), and select/de-select usernames to manage access. Click Save changes in the top-right corner.
Requesting Access to a Workspace (Default Users)
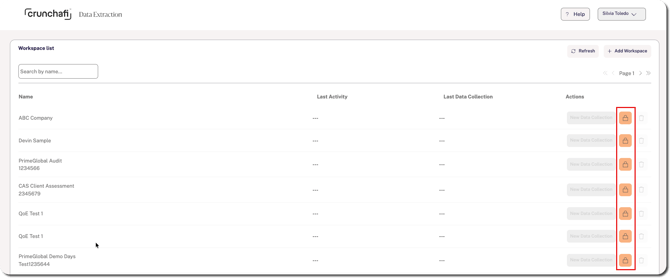
If you are a Default User and do not have access to an existing workspace, you can request access by clicking on the lock icon located at the far right of the row from the list page.
Was this article helpful?
YesNo